My Previous article: tip with glitch of guardian skill - General - LifeTO
(3rd Revision: 2026-01-04) [The Ultimate easy Guide to simplifying Guardian Graph Allocation] 1st Revision: 2025-09-26)
Hello, I’m BuffyBuffa/PureDA, a legitimate player dedicated to fair play.
I want to share my tips on how to create a Guardian graph with total ease! Unless you are making highly specialized adjustments, this guide will save you from overthinking or agonizing over your graph development. Simply pick the Guardian form you want and follow my instructions. Save your time!
In this guide, I have listed only the easiest and simplest methods. I have personally tried and tested every one of them. Do not ask why other methods are missing—this is intended to be the easiest and most straightforward guide available XD.
My guide is based on a total of 14 graph points, but you can adjust your total points to customize your Guardian’s color. I sincerely hope this guide makes you comfortable when deciding on and creating your Guardian graph. If you have any questions, feel free to DM me on Discord anytime!
P.S.) Regarding Legendary Guardians(a.k.a [legendary empathy]):
-
CRITICAL: You must burn these 1,000+ cards AFTER equipping the Soul Seed but BEFORE you begin the base empathy!
-
Update: If your total graph points (Sum of Base Empathy + Secret Empathy) reach 18, you are guaranteed a Legendary Guardian.
-
Note: If you follow this guide for a Mighty form (14 points), you simply need to burn 1,000 cards via Card ID to meet the requirement.
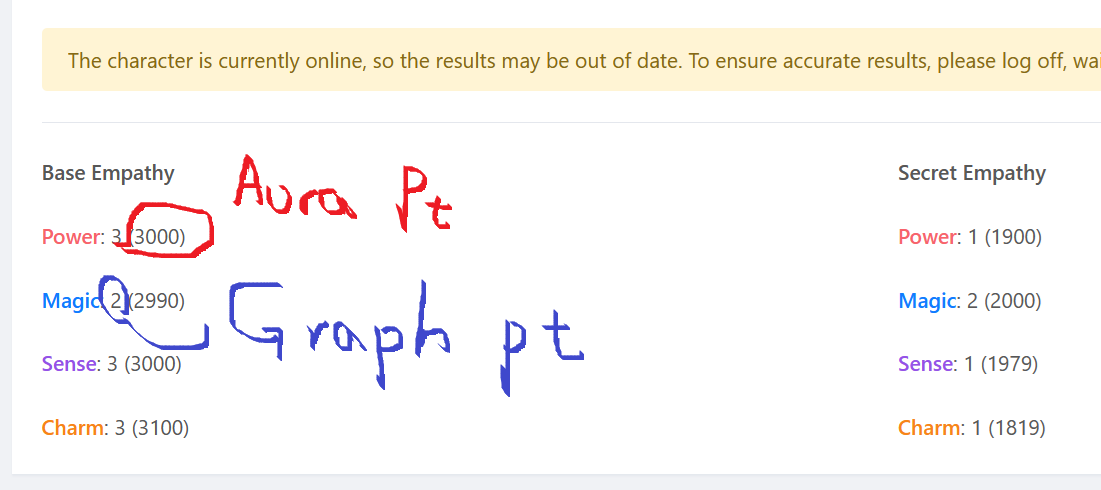
Basic Rule of base empathy
- P= power // M= Magic // S= Sense // C= Charm (Graph)
Raymonf has developed and provided WONDERFUL QoL; Soul Seed Viewer.

You won’t find this QoL anywhere but lifeto. It’s practically essential for Guardian Graphs, so make sure to use it. Trust Raymonf, you’re missing out!
Let’s establish a key definition: 1,000 Aura Points equal 1 Graph Point.
-
Guardian’s Graph can get total 14points. In other words, This guide focuses exclusively on the 14-point build (Mighty form).
-
The 14-Point Cap: 14 points is the absolute maximum for your graph; once the sum reaches 14, the base empathy process will terminate immediately.
( HOWEVER, if the 14-point cap has already been reached, this automatic adjustment from 0 to 1 will not trigger.)
-
Immediate Stop: When any single graph reaches 6 points, the empathy process finishes immediately.
-
Hatching Bonus: Don’t worry; after hatching, any 0-point graph will automatically become 1 point.
-
Tie-Breaker: If multiple graphs have the same number of points, the shape of the Guardian is determined by the specific behaviors that promote those types the most.
-
Skill Ratio: Graph Points = The number of Guardian skills available.
- Leveling Warning: Avoid TM and Base Level-ups during this process; they make the graph status complex and difficult to manage.
-
Irreversibility: BE CAREFUL—once you finish the graph, there is NO going back.
-
Charm Efficiency: Except for hatching a Krusef, the Charm graph is absolutely WORTHLESS. I set three Guardians to C1 for skunk pouch skill. (C2 is only for Magic types like Sheep/Dragon, though I doubt [Mag Def Breaker] is effective).
That’s why I strictly prioritize investing in Attack stats especially to avoid useless Charm graph raising.
BONUS) If two or more graph points are tied, and their Aura Points are also identical, the Guardian’s appearance will be determined randomly.
However, if the Aura Points of your desired graph type are at least 5 points higher than the others, the Guardian form corresponding to the highest Aura Points will hatch.
Example: Suppose you have an [P4 S4 M4 C2] graph. In this case, the Charm-type Krusef will never appear.
-
If the Aura Points for P4, S4, and M4 are all exactly 4,000, then you will randomly get either Sephirens (Attack), Digrimm (Magic), or Ifron (Sense).
-
However, if the Aura Points differ, the outcome changes. For instance, if you have P(Aura point: 4,000), M(Aura: 4,100), and S(Aura: 4105 or 4,995), the graph remains P4 M4 S4, but you are guaranteed to hatch the Sense-type Ifron because its Aura Points are the highest.
(But NEVER worry. Raymonf has developed and provided soul viewer tool!
When Aura Points reach 1000, the graph increases by 1. If the graph values are identical, it will hatch into the form with the higher Aura Points, even if it’s just by 1.)
[Let’s START!]
1 - How to Raise your Power (P) Graph Points
-
Spamming HP Potions: You get 1 point for every 2,500 HP potions you use.
-
Investing Power Stats: You can raise this graph up to 2 points through stat investment. To be precise, 125 stat points equal 1 graph point. So, you just need to dump 250 points into Power-type stats!
※Don’t get confused: The hard cap is 2 points total(0→2). It is not an additional 2 points on top of what you have.
2 - How to Raise your Magic (M) Graph Points
-
Spamming MP Potions: You get 1 point for every 2,500 MP potions you use.
-
Using Magic Skills: Every 500 successful skill casts earn you 1 point. (The upper limit here is 5 points).
-
Investing Magic Stats: You can raise this graph up to 2 points through stat investment. Investing 250 points into Magic stats will bring your Magic graph to 2!
Again, don’t misunderstand: The total cap is 2 points, not an extra 2 points added to your current score.
3 - How to Raise your Sense (S) Graph Points
-
(Drill) Empty Detection: A term of my own definition. when you stick your drill in the ground and get that “There is no item here” message along with that annoying emoticon.
-
You get 1 point for every 1,000 times this happens. (The upper limit is 3 points).
-
Item Excavation: You get 1 point for every 1,000 successful digs.
-
Spamming MP Potions: For Sense, it takes 5,000 MP potions to get 1 point.
-
Item Compounding (Normal, not Mature): You get 1 point for every 500 compounding actions. (This can take you from 0 to 3 points).
CAUTION: When trying to raise your Sense graph through compounding, REMEMBER that whether you compound 99 items at once or just 1, it still counts as only ONE action(=1 attempt). Do it one by one!
- The Pro Strategy: The most convenient way is to buy [Replenishing Water / Mana Water] from the ETC tab at the Aquaris Shop. Then, head over to Paul (located to the right of the Megalopolis Shop) and craft First-Aid Potions one by one.
-
Investing Sense Stats: Just like the others, 250 points in Sense stats will bring your graph to 2(=0->2).
-
Reminder: The upper limit is 2 points total, not an additive bonus of 2 points.
4 - How to Raise your Charm (C) Graph Points
(Note: Make sure to read Item #8 of the Basic Rules. Honestly, you shouldn’t even have to worry about raising the Charm graph!)
-
Shop Transactions: Buying or selling items to an NPC 500 times equals 1 point. (The upper limit is 3 points). To save time and money, just buy or sell 1 item at a time!
-
Spamming HP Potions: It takes 5,000 HP potions to earn 1 point for the Charm graph.
-
Investing Charm Stats: 250 points in Charm stats will bring your graph to 2.
Once more: The upper limit is 2 points total, not an additive 2 points.
Recommendation!!
I INSIST that every guardian SHOULD have [P3+S4] or [P4+S4] graph.
(Because, Lifeto is in 2nd season, so there is no Chaos Tower in lifeto. But, if the Chaos Tower is released, you should have P3+S4 or P4+S4 graph as a base.)
(Of course, S4 or S5 is for [Shield breaker] for every character!)
And in My guide, only C1(every character) or C2(for ONLY magic type but super low efficiency) are base of my guide. but, if you want to get Charm type guardian, Krusef, you must sacrifice your Magic graph point…)
and I will show you two ways to make your guardian’s graph.
you can skip Drilling! no AFK drilling!!
(Though I STRONGLY recommend using driller boy to do AFK drilling…)
But you can use macro program to do item compound or spamming potions!
Also you can do AFK drilling to raise sense graph!
So, here are some Examples to help your understanding!!
[P4 M4 S5 C1] Ifron
[[First way (No AFK drilling)]]
-
Drinking point back or graph back and investing 250pts of any Power stats (P2 M0 S0 C0)
-
Spamming 5,000 HP potions (P4 M0 S0 C1)
-
Completing 1,500 compounding attempts (P4 M0 S3 C1)
((↑ OF COURSE, you can invest your 250pts of stat into any sense stat and just do 500 times of Item compound to save your time!)
- Spamming 10,000 MP Potions (P4 M4 S5 C1)
[[Second way(Yes AFK drilling)]]
-
Drinking point back or graph back and investing 250pts of any power/sense/magic stats(total 750pts) (P2 M2 S2 C0)
-
Spamming 5,000 HP potions (P4 M2 S2 C1)
-
Spamming 5,000 MP Potions (P4 M4 S3 C1)
-
Doing AFK drilling until your sense graph will be 5. (P4 M4 S5 C1)
[P5 M4 S4 C1] Sephirens
[[First way (No AFK drilling)]]
-
Drinking point back or graph back and investing 250pts of any power stats (P2 M0 S0 C0)
-
Spamming 7,500 HP potions (P5 M0 S0 C1)
-
Completing 1,000 item compounding attempts (P5 M0 S2 C1)
-
Spamming 10,000 MP Potions (P5 M4 S4 C1)
[[Second way(Yes AFK drilling)]]
-
Drinking point back or graph back and investing 250pts of any power/sense/magic stats(total 750pts) (P2 M2 S2 C0)
-
Spamming 7,500 HP potions (P5 M0 S0 C1)
-
Spamming 5,000 MP Potions (P5 M4 S3 C1)
-
Doing AFK drilling until your sense graph will be 4. (P5 M4 S4 C1)
[P4 M5 S4 C1] Digrimm
(↑ My recommendation; for ALL Magic types, especially Fire/Thunder sheep. (BCS your guardian can learn glacial shard which is the skill to lower/reduce enemy’s Thunder resistance down.))
(p.s: Glacial Shard(=Shard of the Glacier) from guardian is not very effective due to its incredibly low accuracy; while it works on normal mobs, the hit rate against Bosses or Shadow Monsters is practically Zero, even after your Guardian reaches the level cap.(Lv. 200))
[[The easiest way (No AFK drilling)]]
-
Drinking point back or graph back and investing 250pts of any power stats (P2 M0 S0 C0)
-
Investing 250pts of any sense stats (P2 M0 S2 C0)
-
Spamming 5,000HP potions (P4 M0 S2 C1)
-
Spamming 12,500 MP Potions (P4 M5 S4 C1)
[P3 M5 S4 C2] Digrimm
(↑ not recommended, not so effective for Magic types…)
[[The easiest way (No AFK drilling)]]
-
Spamming 7,500 HP potions (P3 M0 S0 C1)
-
Buy items from NPC shop, one by one, total 250~500 times (P3 M0 S0 C2)
-
Completing 1,000 compounding attempts (P3 M0 S2 C2)
-
Spamming 12,500 MP Potions (P3 M5 S4 C2)
[P4 M1 S4 C5] Krusef
(↑ not recommended.)
[[The only way(Requiring AFK drilling+NO point/graph back)]]
-
Buy items from NPC shop, one by one, total 1,500 times (P0 M0 S0 C3)
-
Spamming 10,000 HP potions (P4 M0 S0 C5)
-
buy [drill boy] and leave your character on any maps to auto-drill until your Sense graph will be 4. (P4 M0 S4 C5)
-
after hatching, it will be [P4 M1 S4 C5]
CAUTION! If you forget to stop drilling until Sense graph reaches 5 points, You risk getting a random form… Ifron or Krusef, random result may occur…
So, If you want to eliminate this unwanted possibility, you must stop AFK drilling when the Sense graph point reaches 4.
[P4 M2 S4 C4+] Krusef
↑ my recommendation for Krusef.
We will meet chaos tower soon!
[[The only way(Requiring AFK drilling+NO point/graph back)]]
-
Buy items from NPC shop, one by one, total 1,100~1,200 times (P0 M0 S0 C2+)
((C2+ means, your charm graph is 2,but your charm aura point would be 2200~2400(anyway, under 2999.). it is for removing unwanted result; hatching for krusef surely.)) -
Spamming 10,000 HP potions (P4 M0 S0 C4+)
-
spamming 5,000 mp potions (P4 M2 S1 C4+)
-
buy [drill boy] and leave your character on any maps to auto-drill until your Sense graph will be 4. (P4 M2 S4 C4+)
-
after hatching, it will be [P4 M2 S4 C4]
p.s) about Recommendation skills on your guardian.
read first: [2nd revision] Guide to Activating Guard Break via Rune Glitch - General - LifeTO
Power: Luck Breaker / Shockwave+(Faint)+(Guard break)
Magic: Rust. (If you’re planning to hunt Chaos Tower bosses, you can add Mana Arrow and Arrow Rush to your guardian—they can shred 6 layers of the boss’s [Guard] count.)
TBH, let them learn whatever you want… glacial shard is not so effective(by its miss), and your guardian RARELY uses Cure…
Sense: Stone Strike+Armor Destruction+Lucky Seven+Shield Breaker.
Charm: only Skunk Pouch. done.
Thanks for your reading!